Showing posts with label Blue and Gold. Show all posts

Tuesday, March 1, 2016

Blue and Gold - Flight

For this year's Blue and Gold Banquet we chose to go with a flight through the ages them.  Again we decided to begin with figuring out the decorations.  We went through a few different ideas, but finally settled on one.  The modes of flight we highlighted were kites, hot air balloons, airplanes, and space shuttles.  We were going to throw a dirigible in there, but ran out of time due to my having surgery a week before our banquet.  I suggest avoiding surgery right before your event.  We had our modes of flight laid out as follows: kites on the side walls, the dirigible was going to be on the back wall behind the food, hot air balloons as the center pieces, paper airplanes strung up above and a cardboard space shuttle up front.

With that plan in place the next thing to do was figure out how are we going to do it.  We always have the scouts help with the decorations in one way or another, so we decided to have them decorate kites and fold paper airplanes.  For the kites we purchased white poster board.  We were able to get 5 small kites out of each poster board and one large kite per poster board.  We had 4 large kites with the Bobcat, Wolf, Bear, and Webelos insignia on them.  We recycled the insignia from the previous years banners.  The boys were given a stack of kites and the craft bucket and told to go at it.  They each made at least two kites, some made more than that.  We used blue and yellow ribbon for the tails of the kites.  So as the boys colored two of the den leaders and I worked on cutting ribbons and tying tails.  The tails were probably about a foot long with 3" ribbons of the opposite colored tied down the length of it.  So one long blue tail with 3 yellow ties or vice versa.  Once the boys were done with the kites we had them start folding paper airplanes.  The airplanes were all made from yellow or blue card stock.  We asked them to all fold them the same way as they were for decoration.  Once they had folded over 90 airplanes we let them have at a pile of construction paper to fold whatever type of airplane they wanted.  They split off into groups for the last 20 minutes of that meeting with their dens to work on rank objectives.  Once we had the paper airplanes home we cut straws into 1-2" pieces and taped them to the tops of the airplanes.  So they won't hang funny you need to find their center of balance.  To hang them we threaded a string through the straws and strung them across the gym walls towards the ceiling.  Now that we had the boys kites done and the airplanes folded, we took the 4 large kites added the insignia and added yellow or blue construction paper around the outside for some color.  Some of our leaders had real kites which they brought and hung up for extra pops of color.  Wall and ceiling decor done!  

POSTER BOARD KITE TEMPLATE:


 Next we worked on the center pieces.  We again used square tissue boxes as the base.  This time though we cut them in half for baskets.  We spray painted the tissue box baskets either blue or yellow.  Once those were done they were set aside for drying.  We decided to use helium balloons for our, well balloon.  We debated using a non-helium balloon and using skewers to hold it up, but the helium balloons were just much cooler.  For the bottom part of balloon we took a standard 8.5" x 11" paper and cut it into strips that were 8.5" x 2".  We then wrapped it into a circle and taped it close.  We used regular sheet paper as card stock or construction paper were too heavy for the helium balloon to hold up well.  We then took blue and yellow skinny ribbons and cut them into 5-6" strands.  You needed 4 strands per balloon.  We used yellow ribbon for the blue boxes and blue balloons and blue ribbon for the yellow boxes and yellow ribbons.  On the ribbon you want to use the skinny, lightweight ribbon or the balloon can't hold up for long.  We had printed out the 4 insignia again for each of the hot air balloons.  My teens helped cut them out and glue them to all the boxes.  Once the boxes were done we set them aside again.  Next we took the circle paper rings and the ribbon.  We taped the ribbon to the paper.  You need to have the 4 strands fairly evenly placed around the paper.  We eyeballed it as it didn't have to be perfect.  Once that was done we put them in with the boxes and set it aside until day of the banquet.  Day of the banquet we had blue and yellow balloons filled with helium.  To assemble everything we took a balloon, taped on the paper circle at the bottom so it covered the tied end.  Then each of the strings dangling from the paper circle were taped into each corner of a box.  And voila!  You have a hot air balloon.  We purchased some blue and gold Easter hay for the inside of the box so that people weren't just looking at the plain inside of a tissue box.  We put one box on each of the dining tables and one on the cake table.  On to the next project.


The Space Shuttle was the biggest project of all.  My husband brought his skills as a builder to bear again here.  He grew up on Air Force bases, so to him having the shuttle look recognizably like a space shuttle was important.  In my head I'm thinking something more cutesy.  I should have known better!  Google sketch-up to the rescue again!  My husband drew up plans on sketch-up for how he would make the shuttle.  A friend of mine had kindly donated their water heater box to us.  I'm sure my husband could provide better instructions, but from what I saw he cut long sections of box and taped them together to form the shuttle.  He then painted it white.  He cut the wings and tail out of spare card board pieces.  These were also painted white.  Then using some black paint he hand painted on the windows and the black outline of the wings.  We happened to have some red and blue paint on a desk in our bedroom, so he also painted on the US flag on the wing of the shuttle.  It ended up looking great!


We had planned on a dirigible for our back wall behind the food table.  However due to time constraints from my foot surgery we just didn't have time.  This is the sketch of what we were planning on doing.  We were just going to make it out of a big roll of paper.  (Sorry for the sideways pictures.)


For the invites I found something on Pinterest that I knew would work perfectly.   Using this as a template I made up our plane tickets that were handed out to each of the scouts and the boys who would be joining us this year.  Being LDS all our boys are invited to join scouts when they turn 8 years old.  The plane tickets were printed on yellow card stock and the ticket holders were printed on blue card stock. The holders were folded somewhat in thirds.  I used the ticket as a guide compared to the holder where the wording is.  Then folded it there and again.  The final third wasn't a true third, but that was fine.  I cut it down so that it was just a small corner that would hold the ticket in.  I taped this part down.  Just like that the tickets are ready to be handed out.


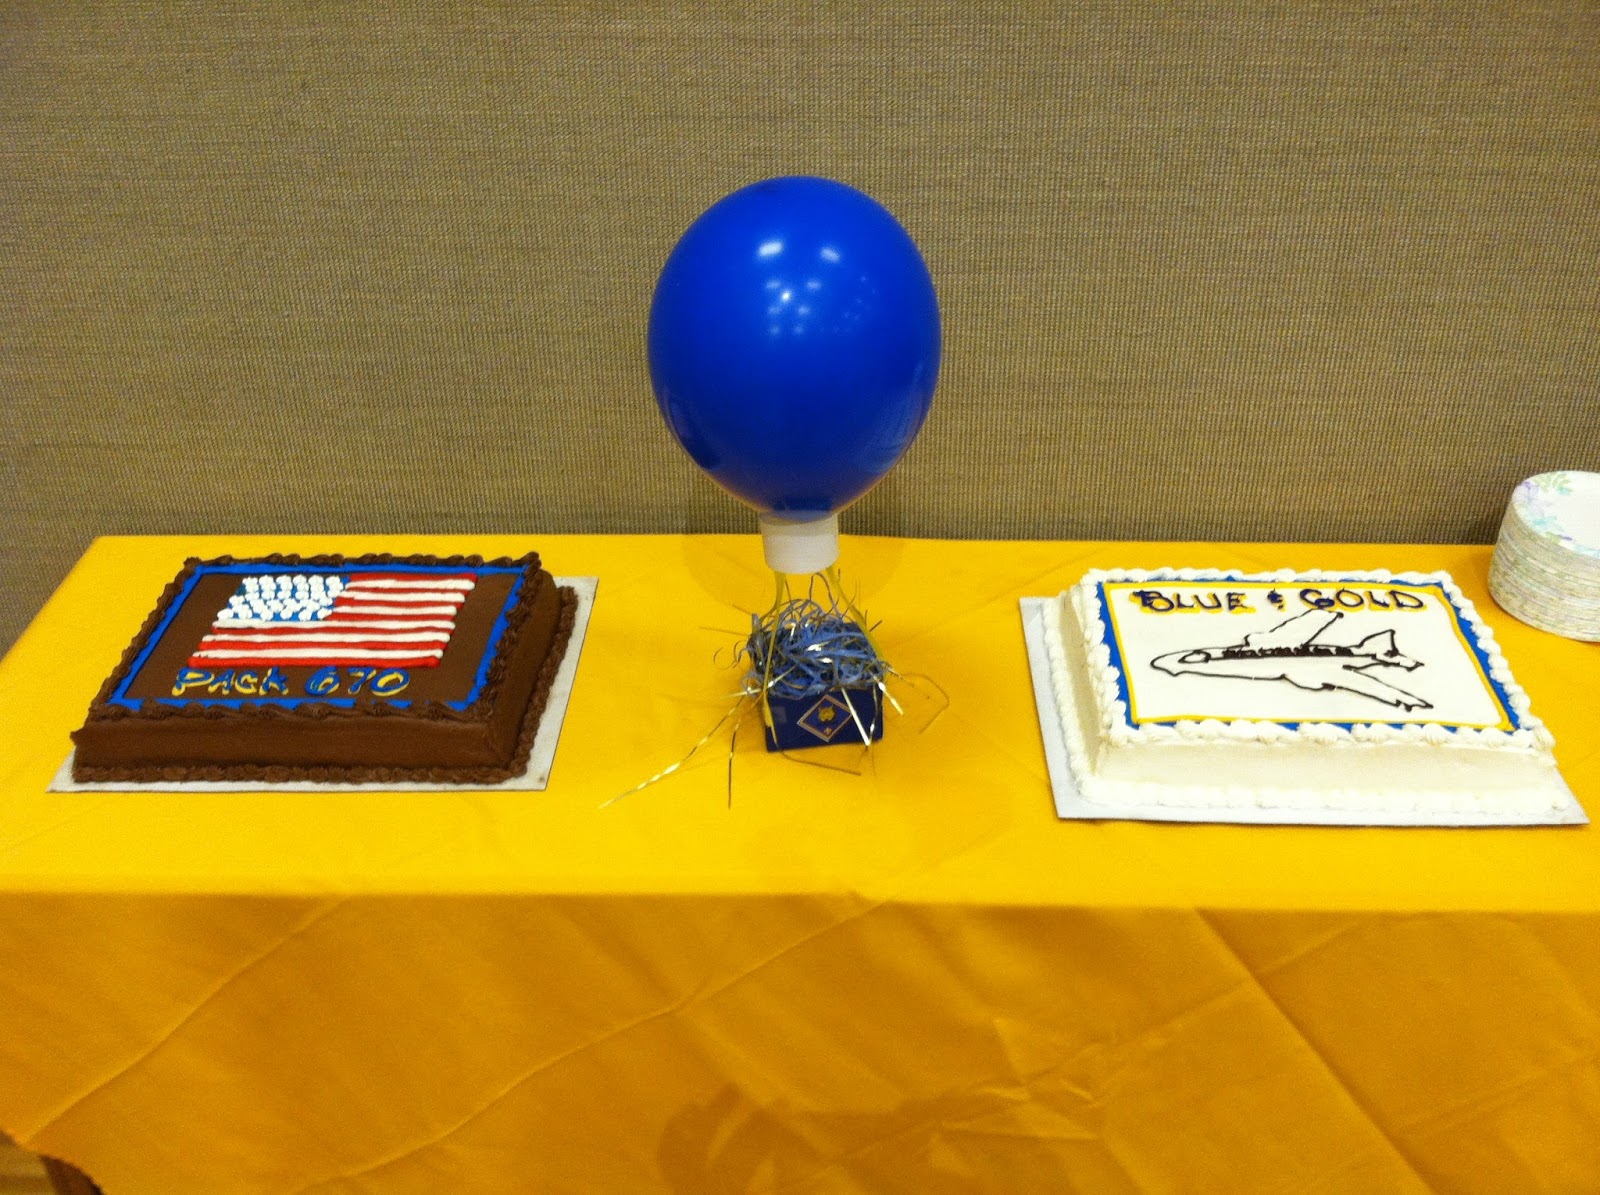
 We were expecting over 100 people for our banquet, so for dinner we went with spaghetti, a meat sauce, rolls and a salad.  We had cakes from Costco for dessert.  A chocolate cake with the American flag and a white cake with an airplane on it.


The final set up:


Monday, February 29, 2016

Blue & Gold Banquet - Medieval

Blue and Gold Banquets.  This event can be overly stressful if you let it.  It is the biggest Cub Scout event of the year. First things first, the theme.  Once you have a theme decided you can start working the magic.  The Blue and Gold doesn't have to be a production, it can be as big or small as you want it.  I have a friend who for theirs decorated by putting two helium balloons, one blue & one yellow, at each table and was done.  Nothing wrong with that at all!  However, we tend to go a bit bigger.  We can't help it, I think it may be a sickness.  ;)

For our 2015 Blue and Gold Banquet we had decided to go off the theme of Medieval.  So where to start.  The answer to that is decorations!  We decided to have the boys all decorate shields to represent themselves to be hung on the walls.  We also decided on a cardboard castle at the front of the room as a backdrop.  We were originally going to have the boys help with making the castle, but due to time constraints the leaders made the castle while the boys worked on the shields and their tunics (more on that later).  For the shields I took cardboard and cut out shields that were about 18"-24" in height.  We had a bucket of craft supplies and let the boys have at it.  They were allowed to make their shields in any way they wanted.  Some of them got pretty creative, while some just wanted to get theirs done and move on.  It all depends on the boy.  Once the shields were done we cut a long piece of string which we taped both ends of to back of the shield.  When it came time to decorate we stapled the string to the wall (tape would work depending on your wall) and our shields were hung up.  We also did 4 larger shields which had the Bobcat, Wolf, Bear, and Webelos rank insignia on them.  At the back of the room we used 4 Harry Potter banners to decorate behind the food tables.  We used the back of the HP banners and taped on the 4 scout rank insignia from the shields and then put a strip of yellow and blue crepe paper on the outer edges to make them look fancier.  To make the scouting rank insignia for the shields and banners we used our projector hooked up to the computer to trace them out.  The castle was put together using some donated cardboard.  As I wasn't involved in the making of it, only the painting of the bricks, I'm not 100% how they built it.  As we had a boy receiving his Arrow of Light at this meeting, we made shields with the Arrow of Light insignia on them and put them on the castle. The last part of the decorations were the center pieces.  We decided to put castles on each of the tables.  We collected all the square tissue boxes that we could over the year.  Then we went to work making them into castles.  To do this was fairly easy and we involved the boys here also.  We printed out black and white brick walls onto card-stock.  We also printed out the 4 Cub Scout rank insignia talked about earlier in color.  The boys all helped color the brick walls, mostly in browns and reds, though some got creative in their color choices.  It took 2 pieces of card-stock per castle, so we had each boy color two sheets the same.  After all the sheets were colored we had them cut out the scouting rank insignia.  Once we got these things all home we made slip on covers for the castle walls.  Once the walls were assembled we glued on a den insignia banner on each side of the castle.  We also took bamboo skewers and glued the den rank insignia onto them at the top for a little extra coming out the center. My husband also printed out some color copies of a stone brick wall and we used those for the cake table decorations, while the boxes the boys did were on the dinner tables.

SHIELDS:


BANNERS:


CASTLE:


CENTER PIECES:

BRICK TEMPLATE FOR COLORING:

 BRICK TEMPLATE FOR PRINTING:

SET UP FROM FRONT AND BACK:


Our invitations were as follows:
Here is the original shield design we based ours off of.  I made the invite in Microsoft Publisher again and so used a shield and sword found in their default clip art. Then inserted the rank insignia on top of it. 


Since our theme was medieval, we decided the boys would all be knights.  So of course a knight needs a tunic and his crest.  We had some paper grocery bags in our garage that we decided would make the perfect tunics.  I had my kids help me with the cutting, as it was going to take some time.  First we cut the sides out of the bags.  We then turned them inside out and folded them at the top.  We then cut out a half circle in the middle of that fold.  We then opened it and cut a slit in from the outside of one side into the middle where the circle was.  This made it so the boys could easily put it on and off.  We used a small piece of tape to help hold it closed.  So that it wouldn't tear it, we put down another piece of tape underneath it so the tape holding it closed was on top of tape and not the bag.  We also cut out yarn and taped them halfway down the sides to make tie closures.  Each boy was given a bag and asked to decorate it in a way that represented them.  It could be anything that they loved as it would be their knight crest.  The boys were given a bucket of crayons and markers and told to go at it.  We had a crest with a Pikachu, one with a monkey wizard, an artist dragon, Minecraft, and many others.  The boys got very creative here!  We also made a tunic for each of the incoming Cub Scouts for that year.  We used the projector again and put the Bobcat insignia on each of these tunics.  We also made a couple extra tunics for boys who hadn't made one of their own, one was a dragon and the other a lion.  We were able to find foam swords and shields in the dollar bin at Target and bought them out.  So now our boys were all equipped with a tunic, a sword, and a shield.  Our knights were ready to go!  Since the boys were all dressed up, we figured the Cub Master should be too.  Using a stray piece of fabric and some felt we made me a tunic with the fleur-dis-lis on it.  I wore my brother's vampire cape and one of his swords at the waist.  My mom let me use our Forbes family crest pin to pin the cape.  It worked out pretty well.  Since there was now a sword involved it was decided that we would "knight" the boys who were getting a rank advancement.  So they were knighted into the Order of the Bobcat, Wolf, Bear or Webelos.  The boys got a kick out of that. The boys also did a skit for the parents.  We used a skit that we found here: http://insanescouter.org/p/2564/142/The_Reluctant_Knight_And_The_Magic_Herb.html
We changed the name of the knight at the end to Sir Brave a Lot instead of Sag-No-More.  It turned out very cute!
TUNICS:


SWORDS AND SHIELDS/KNIGHTING:


CUB MASTER:


 For food we decided to go with finger foods.  We did baked chicken legs, veggies and dip, potato wedges, and jello jigglers.  The jello didn't set up quite right, so that ended up having to be eaten by fork.  We had two cakes, one chocolate and one white.  One had the American Flag on it and the other we got plain with a congratulations on it and then utilized the projector again to draw the Arrow of Light on it in yellow.


Sunday, February 28, 2016

Thrown into the Deep End

I became the Cub Master for our Pack in January 2014.  The following week was the Pinewood Derby, followed closely the next month by the Blue and Gold Banquet.  I won't lie, I almost freaked out!  Then my husband, who was the Webelos leader, told me that everything was already planned out.  I just had to show up and be in charge.  Sure, not a problem.  And so began the craziness of the last two years.  At this point we have had 3 Pinewood Derbys, 3 Blue and Gold Banquets, 3 Rain Gutter Regattas, and approximately 12 pack meetings.  Every time there is a frantic question running through my head of "what are you going to do this time???".  We want our activities to be fun and to include the whole family.  So far, so good.  As I continue on my quest for fun pack meetings I will share what we have done/are doing here.  I find that as a Cub Master figuring out these meetings is the hardest part of the job.  Once everything is figured out and in place it seems to run fairly smoothly.  You just have to figure out what it is that you are going to do.  Often easier said then done.  I hope that you find this blog useful.